5.3. Setting up the Environment
Learn by Experimenting!
For each of the remaining sections in this chapter, be sure to login to Odin and type out the commands given in each part, taking notes as needed. When you are done, you will have a step-by-step outline for creating and using interfaces in Java. Your notes and will be very useful on upcoming homework assignments and projects.
As you work through this example, you will write code to properly utilize an
interface called Styleable that allows you to seamlessly change the way
text is printed to the screen. This section is all about getting that
environment setup on Odin.
On Odin, complete each of the following steps:
Use the following command to download the starter code for this chapter and places it into a subdirectory called
cs1302-interfaces:sh -c "$(curl -fsSl https://cs1302uga.github.io/cs1302-book/_bundle/cs1302-interfaces.sh)"
- downloading cs1302-interfaces bundle...
- verifying integrity of downloaded files using sha256sum...
- extracting downloaded archive...
- removing intermediate files...
subdirectory cs1302-interfaces successfully created
Change into the
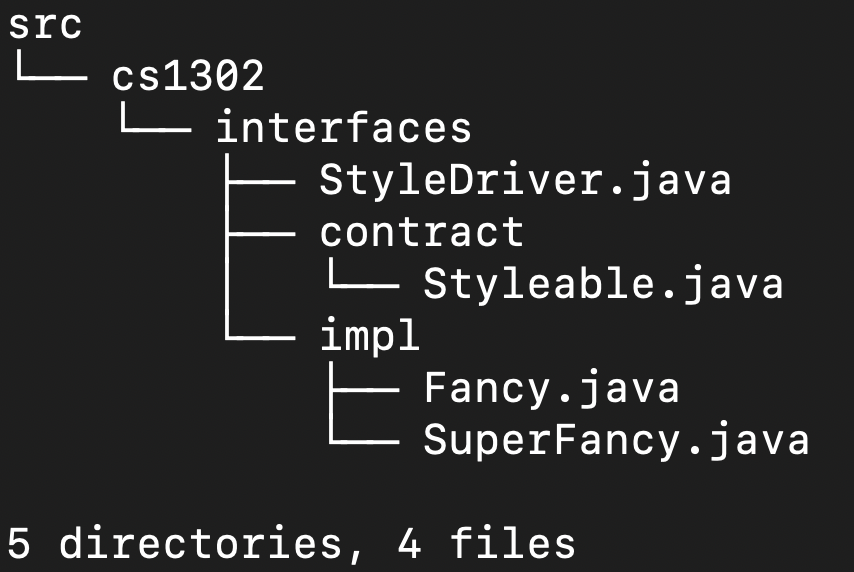
cs1302-interfacesdirectory that was just created and look around. There should be multiple Java files contained in thesrcdirectory. To see a listing of all of the files insrc, use thetreecommand as follows:tree srcYou should see output similar to the following:

Each subdirectory within
cs1302-interfacesplays a role in the example. Here is a breakdown of the different subdirectories and their roles:srcis the default (no-name) package directory for our source code (default package for source code);cs1302stores the main driver program (with themainmethod).interfacesstores ourStyleableinterface code.implstores two different implementing classes. Each one implements theStyleableinterface in a different way.